Showing posts with label ikea. Show all posts

Sunday, 16 May 2010

Back again! Been busy...

It's been a very busy month and I've had barely any time to myself, so this project was put on hold for a while.

I've been developing a few designs for a purpose built joystick that I'm quite excited about, but that's a huge job in itself.

Today I finally got round to mounting the monitor. Once the TFT had been removed from its shell and I'd cut the surplus matal off the frame, I needed to cut a section out of the tabletop to house the monitor. I measured carefully then cut an aperture out of the top, just the right size for the screen. From the back, an aperture big enough for the main unit, set all the way in but stopping a couple of millimetres short of the top. I used a router to do this, I have a guide clamp that helped keep things lined up neatly but the main job was making sure everything was marked out carefully :)

Photobucket

Photobucket

I had to use a chisel to manually remove the corners neatly and also to level off anything the router missed:

Photobucket

The end result gives a nice neat bezel around the screen. I simply placed four screws at the edges with washers to keep the monitor in place.

Photobucket

Photobucket

The tabletop with fitted screen:

Photobucket

Initial testing is good, it's a nice fit and looks great with the smoked glass on top. I'm planning on painting the top black so the screen blends in a little more stealthily.

There's plenty of clearance for the top drawer and whatever's stored in it, currently my arcade stick, but also plenty of room for my netbook.

Photobucket

Photobucket

This is essentially phase 1 complete. I originally planned for a unit that would run from my netbook and be operated by my Xbox 360 arcade stick. I can play with the stick resting on the top drawer or on my lap with the drawer closed (mainly for horizontal games)

Photobucket

Photobucket

The more I've got into it, the more I want to adapt it and get it self contained, so next phase is to build a PC to go inside the unit.

Tuesday, 13 April 2010

To chop or not to chop?

Been a busy week so far, but had a chance to take a closer look at the innards of the monitor tonight, particularly the steel casing.

There was a glimmer of hope when I noticed the tabletop was a little wider than the unit overall, which would just about let the screen fit centrally with some careful use of the router. Problem is, the monitor is thicker than the tabletop, so there would need to be a little wood cut from the side of the unit, which would look terrible.

So, off out to the garage for some experimentation - it looks like some very careful sawing could remove the section around the control panel, allowing for an easy central fit on the tabletop. Not doing it tonight though, going to get a few nice fine-toothed blades for my saw first.

Saturday, 10 April 2010

Not going to be easy...

Well, in my infinite wisdom I decided to put a bit more time into this project late on a Saturday night after a few bottles of cider. All things considered I've come out of it relatively unscathed.

First things first, as this is such a nice monitor I wanted to see if I could get away with keeping it in its original casing, but a quick check on top of the unit after removing the stand showed it was just too big:

Photobucket

It was then that I somewhat rashly decided to set about removing the casing, to see if there was any way of minimising the width...

A few tense minutes later and we have this (excuse the blurry photo!):

Photobucket

Unfortunately the shielding extends all the way to the bottom of the monitor where the control PCB is:

Photobucket

Managed to fiddle around removing screws and a very tricky ribbon cable to get the PCB out of the way and get a better look at the offending piece of metal:

Photobucket

I thought about using a router to remove some of the inside of the IKEA unit to allow it to fit, but I would need to remove 17mm, which is about the thickness of the wood so that's a no. My other options are to cut away the piece entirely, which is going to be tricky without damaging the TFT, or bending it, which is also going to require some cuts. That's going to have to be a more sober decision I think.

What I did do, however, was to hook up the monitor for a little testing, albeit off to one side in the cab. I removed the top of the unit and hooked up the panel to my netbook, plugged it in and lay it flat on top of the closed drawer. Got MAME up and running and all looks good:

Photobucket

Photobucket

Then, I opened up the smoked glass panel and laid it over the top, looked fantastic with Pac Man running in it, shame I couldn't have the drawer open for my stick to rest on, would probably still be playing now!

Photobucket

Photobucket

After I packed everything away, tried out the glass panel on top of the unit, it looks pretty good but the white shows up a lot. When the unit is all done I'll need a layer of black paper with a bezel cut out so the screen blends in a bit more when not in use.

Photobucket

So, an eventful evening. I think I needed to be a little drunk to have the confidence to start pulling such a great little monitor apart. Well, more a great big monitor really.

Monday, 5 April 2010

Basic ingredients


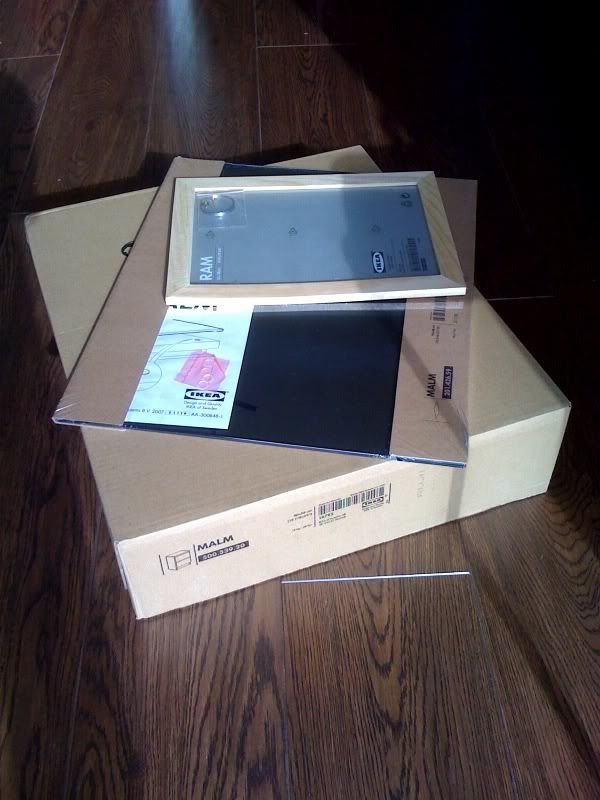
Got the main bits and pieces I needed from Ikea - the MALM 2-drawer unit, smoked glass top and a cheap picture frame so I can nick the plexi from it later if I need it for a joystick CP.


Working prototype

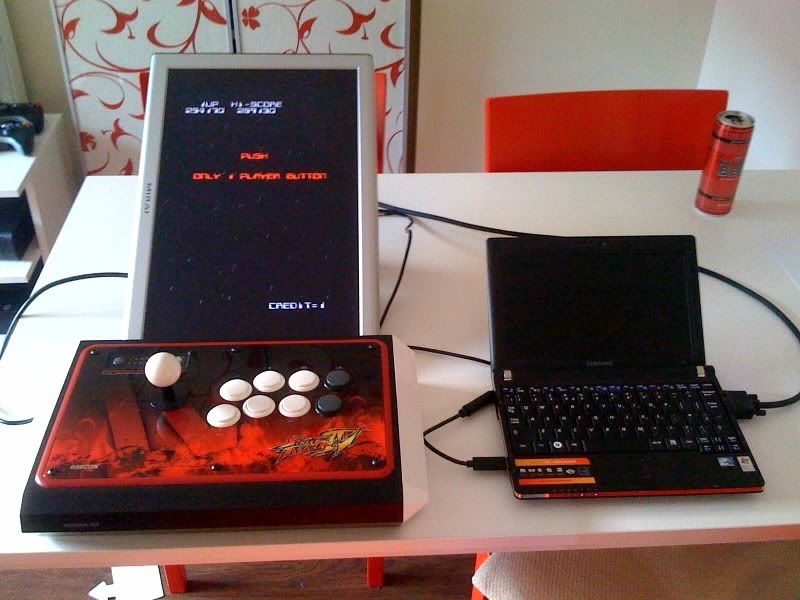
Having had little experience of MAME in the past, I've only recently started to get the hang of it. Most of my previous projects have been based around consoles, so I wasn't 100% sure about what sort of setup I needed, so I started experimenting with my Samsung NC10 netbook, and was surprised at how much stuff ran smoothly on it. It has a VGA out port, so for the moment I'm using that and hooking it up to the monitor directly. Controller will eventually be custom built for the machine, but for now it's the SFIV TE stick, which works a treat on windows.

As you can see from the picture, it was working fine on my recent sessions on Halley's Comet :)

Introduction.

I love playing on arcade machines. The joy of playing a game via a big chunky joystick, especially on a vertically oriented screen, has a big appeal for me.

Having built a Dreamcast powered cocktail arcade cab in the past, and owned a Neo Geo upright cab, these have all had to go in favour of a more sensible home environment to make space for our two kids.

A recent hankering for a new cab brought out some interesting discussion with friends regarding the construction of a new cocktail cab. A modular approach emerged, resulting in a unit that could be packed away or remain a little less obvious when not in use. I looked at IKEA for some simple inspiration, and ended up deciding I may as well use one of their units as a starting point rather than build my own cab from scratch.

Skipping ahead, I've done some further research and decided on a 2-drawer unit called MALM to act as the bare bones for my cab. The plan is that the unit doesn't resemble an arcade cab at all, hence the "stealth" in the title. Until the joystick is revealed and the monitor fires up, it's just going to look like a normal piece of furniture.

The cab is going to be designed pretty much exclusively for vertically oriented or "tated" games, partly due to the shape of the unit I've chosen and partly due to the suitable viewing angles of the monitor I'm using. Also, I can always play standard orientation games via my TV.

Pictures to follow when I get the chance, hope this will be of interest to some people.

Followers